
This is a documentation explaining an approach to produce ‘Terra Preta‘or ‘biochar’ as a private person on a small scale.
Backstory:
When I decided to try to make biochar on my own, I had the wonderful opportunity to do so while working on the well-equipped permaculture farm ‘Hidden Creek’ in Santa Cruz, led by the open-minded and enthusiastic owner Jennifer. A big advantage was that there was a lot of wood available on the property for this experiment.
Interest:
My interest to produce biochar comes from my big passion for permaculture. I have read a couple of books and articles about permaculture and learned about ‘Terra Preta’ and its advantages as a highly efficient natural fertilizer with a significant potential to sequester carbon. Therefore, it can be used in the domain of organic agriculture as well as climate mitigation. Even though the concept is disputed, I read a couple of very convincing articles about it, stating that it significantly enhances the soil’s fertility and its ability to absorb carbon dioxide.
The concept is said to have turned a significant amount of carbon dioxide emissions of the Botanical Garden in Berlin into absorptions of GHGs (greenhouse gases). It is disputed because the gases emitted during the burning process contain cancer-causing particles. In addition, skeptics argue that the resulting material is not even closely as efficient as supporters of the concept think. The right manner to generate it seems to be crucial. Burning the wood without any formation of smoke is one of the most important parts of it.
Goal:
My goal was to find out how easy it would be to produce this dark soil on my own as I read in a permaculture book that it is even possible to do so without a special oven. I wanted to learn it myself in order to create a recipe for Jennifer to enable her to make biochar again, more often and in bigger quantities in the future to use it on her farm. An amazing result would be to constantly improve the soil on her farm (which was already very rich thanks to a lot of her work) . With all the wood available on the farm, there would be no lack of material to produce biochar on ‘Hidden Creek’ within the next few years.
I am going to use this documentation myself to learn about Terra Preta and biochar by trying it out and writing about it. Hopefully, I’ll have more opportunities on other farms in the future so I can spread the knowledge about it.
Difference between ‘biochar’ and ‘Terra Preta’:
‘Biochar’ is the pre-product for ‘Terra Preta’. Biochar is just wood that is not completely burned. It is defined by the ‘International Biochar Initiative’ as „The solid material obtained from the thermochemical conversion of biomass in an oxygen-limited environment“[1]. It is, to current research, a material that can sequester carbon in high quantities and enriches the soil’s fertility.
[1]: „Standardized production definition and product testing guidelines for biochar that is used in soil“ (PDF). 2015. Retrieved 23 November 2015
‘Terra Preta’ is an improved charcoal product created by mixing biochar with other soil-enriching materials. It is also called ‘Terra preta de índio’ (black Indian soil) because it was first discovered in populated areas of the Amazonas. This soil contained charcoal, human feces, compost and manure, often with clay fragments and sometimes with bones from fish and other animals.
To get ‘Terra Preta’ we therefore need to spice up the charcoal with a couple of other ingredients. It is for example recommended to extinguish the fire with urine. If you have a dry toilet, this is a good opportunity to use the urine. The liquid that you will receive as a by-product is a very precious, soil-enriching helper, too.
The urine-soaked charcoal can be mixed with the before mentioned ingredients, like compost, manure and feces to obtain the end-product ‘Terra Preta’.
Recipe for biochar:
As a first step, you dig a conical hole in the soil with a diameter of around 5 feet (1.5 meter) and 3 feet (1 meter) deep. Special ovens to produce Terra Preta exist, but this is the alternative solution for beginners.
On Jennifer’s farm we fortunately had a frame for extra wind protection. The goal is to have a place to burn the wood without smoke and avoiding burning it completely, but to keep the charcoal in a good state. Therefore, a place with nearly no wind is needed.
On the bottom of the hole we placed a ceramic bowl which we had available. In any case, you need a kind of container to burn the wood in and collect the charcoal at the end of the process.

Now the main material needs to be prepared – the wood. Best suitable are medium-sized wood pieces. In my case, I took tree branches with a length of around 27 cm/0.85 foot.

The thicker pieces are placed at the bottom of the container/fireplace, the medium-sized in the middle and a couples of very small ones to light up the fire on top.
The fire has to be lit up from the top and not as it is usually done from the bottom. This is a bit tricky, I mixed very thin wood pieces with small balls of newspaper and entangled them with the first medium-sized pieces which I wanted to transform into Terra Preta.
When the fire burns, you have to make sure that nearly no wind affects it. For this reason, I used slices of cardboard as protection. The main thing to do during the process is to add pieces of wood on the top of the fire before the burning pieces are burned completely to ash. The wood on top should burn until it becomes charcoal, that means black hard pieces of wood. This can be achieved by adding new pieces of wood just before the surface of the burning pieces turn into white ash. With time and repetition, you are going to get a feeling for that.

If you want to stop the process, as you think you burned enough/there is no more space in your fireplace, you extinguish the fire either with urine (which is recommended to enhance the fertilizing quality) or water. I used both as I haven’t had enough urine.

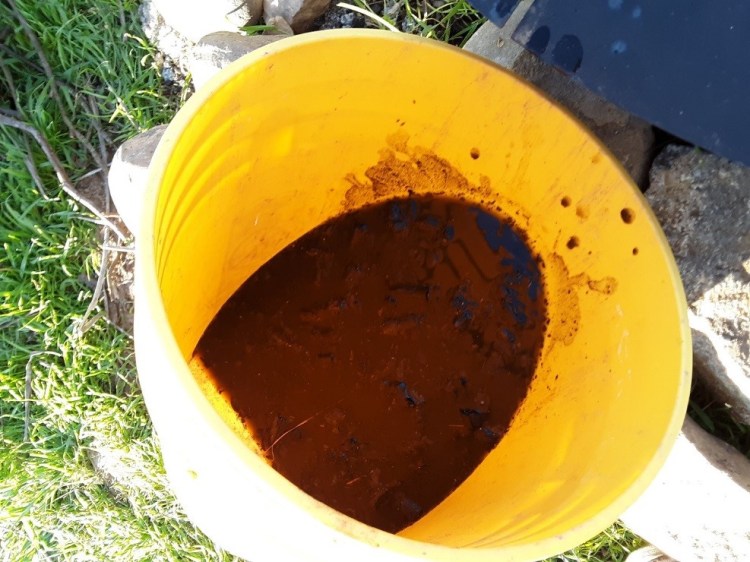
After that, I waited for around 6 hours before I cleared the fireplace. I collected the charcoal pieces and put them in a bucket . This is the end-product biochar (already close to ‘Terra Preta’ as it is soaked in urine). The left-over liquid was rinsed in another vat. This is a very rich and fertilizing ‘soup’ you can use to water the plants which need it.
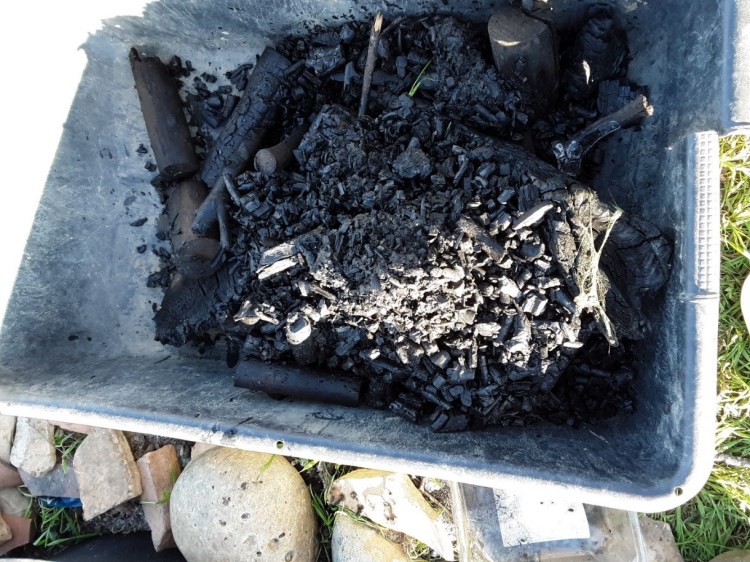
already close to ‚Terra Preta‘ as it is soaked in urine
That was it and Jennifer and I were very happy about my first harvest of charcoal :). I hope with this little documentation I have motivated you to try it out as well.
How to use Terra Preta:
The book I have read to learn about the process[1], recommends adding a handful of the end-product = Terra Preta in the planting hole for a new plant, e.g. a vegetable. The roots of the new plant are not supposed to get in touch with this ‘black soil’ in the beginning, so you put it deep in the planting hole, cover it with soil and place the new plant on top of it. While the plant grows and the roots spread, it’s going to reach the Terra Preta and it can soak up the nutrients.
[1] in German: Scheub, Ute/ Schwarzer, Stefan (2017): “Die Humusrevolution. Wie wir den Boden heilen, das Klima retten und die Ernährungswende schaffen.“, oekom Verlag, München. = English translation: Scheub, Ute/ Schwarzer, Stefan (2017): „The humus revolution. How we heal the soil, rescue the climate and achieve a food change.”, oekom Verlag, Munich.
There are some very good ideas for further use of biochar on this webpage:
